Acebeam Flashlight Troubleshooting: Fix Flickering & Power Issues
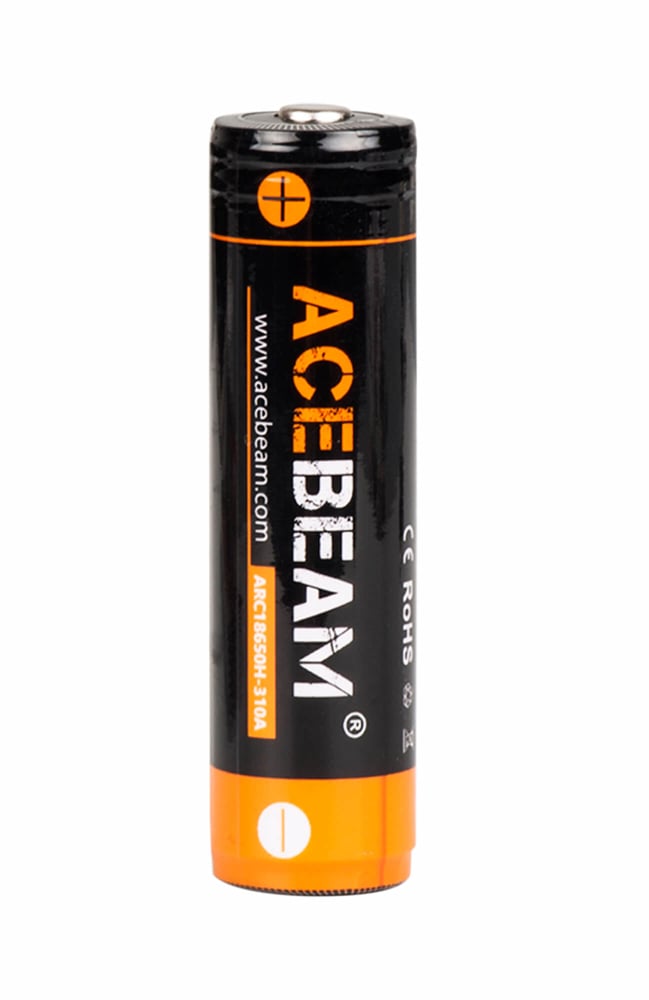
*Replace the battery, please note acebeam models always request battery with high drain and discharging current at least 10A, we strongly recommend using Acebeam approved batteries;
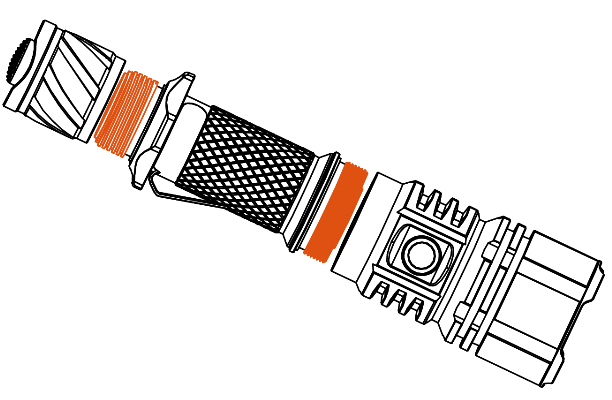
*Clean the all contacts of flashlight periodically with an alcohol-soaked cotton swab, especially the thread, PCB board contact or other contacts are dirty when there is signs of flashlight flickering or having difficulty lighting up;
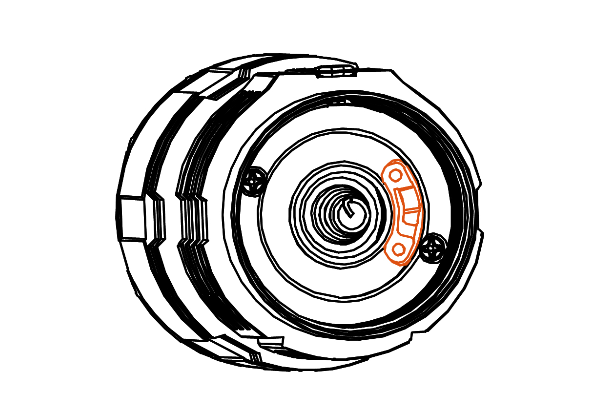
*Make sure the inner tube is screwed on tight, the inner tube may be accidentally touched and loosened, please note there is only an inner tube for models with dual switches such as L16, L30 II;
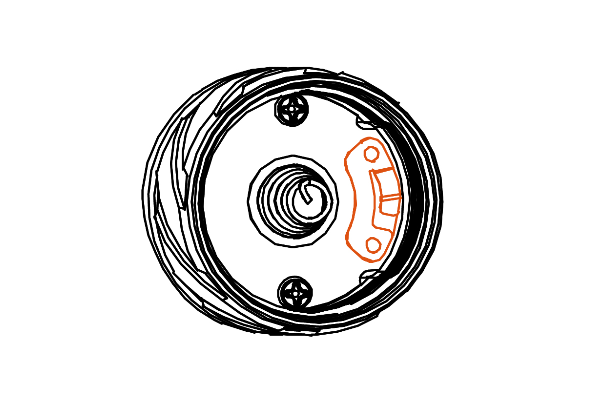
*Raise the spring leaf at the flashlight head or tail cap switch, with the daily screwing of the tube to replace the battery, the spring leaf may be compressed, please note there is only spring leaf for models with dual switches such as L16, L30 II;
1
The Maintenance Protocol: Ensuring Reliability in High-Output Illumination
A flashlight is a precision instrument, not a toy. In the field, the difference between a successful operation and a failure often comes down to maintenance. I have seen high-end tactical lights fail not because of LED degradation, but because of dirty contacts or improper battery selection. When you are running a light that draws 20+ amps on Turbo, physics demands respect. Neglecting the basics—cleanliness, electrical continuity, and power source quality—will result in failure when you need the beam most. This guide outlines the strict protocols required to keep your Acebeam (or any high-performance emitter) operational in adverse conditions.
Atomic Facts: The Core Truths
High-Drain Requirement: Modern high-output flashlights require lithium-ion cells with a continuous discharge rating of at least 10A. Standard rechargeable batteries cannot handle the current draw and will trigger low-voltage protection prematurely.
Contact Resistance: Dirt, oil, and oxidation on threads or PCB contacts create resistance. This leads to voltage sag, flickering, or total failure to ignite.
Mechanical Integrity: On dual-switch models (e.g., L16, L30 II), the inner tube and tail spring leaf are subject to mechanical fatigue. Regular inspection is mandatory to ensure circuit continuity.
Information Gain: Advanced Maintenance & Engineering
To maintain a tactical light, you must understand the electro-mechanical systems at play. We do not just "clean" or "tighten"; we optimize conductivity and thermal transfer.
Battery Selection: The Amperage Threshold The original text mentions a 10A requirement. Let’s clarify why this is non-negotiable.
The Physics of Demand: A light producing 3,000 lumens might draw 8–12 amps depending on the driver efficiency and voltage. If you use a standard "high capacity" battery rated for only 5A, the internal protection circuit (PCM) will cut power to prevent overheating. This manifests as the light turning off unexpectedly during high-output modes.
IMR/INR Chemistry: You need batteries designed for high drain. Look for Lithium-Ion Manganese (IMR) or Lithium-Ion Nickel Manganese (INR) chemistries. These cells sacrifice some capacity (mAh) for lower internal resistance and higher amperage delivery.
The "Approved" Standard: Using manufacturer-approved batteries isn't about brand loyalty; it's about liability and verified specs. Many aftermarket batteries lie about their ratings. Stick to reputable brands (Molicel, Samsung, Sony/Murata) or OEM cells that guarantee the 10A+ continuous discharge rate.
Cleaning Contacts: Preserving Conductivity Flickering is rarely an electronic fault; it is usually a connection fault.
The Enemy: Skin oils, pocket lint, and oxidation act as insulators. Even a microscopic layer of grime increases electrical resistance ($R$). According to Ohm's Law ($V = IR$), increased resistance causes a voltage drop across the contact point rather than the LED, starving the light of power.
The Protocol: Use Isopropyl Alcohol (90%+) and a lint-free cotton swab.
Threads: Clean both the head and body threads.
PCB Contacts: Gently wipe the gold-plated contact points on the circuit board.
Battery Terminals: Wipe the positive and negative ends of your cells.
Warning: Never use water or household cleaners. They leave residues that corrode copper and aluminum.
Inner Tube & Spring Leaf Mechanics (Dual Switch Models) Models like the L16 and L30 II utilize a complex switching mechanism involving an inner tube and a spring leaf (contact clip).
Inner Tube Loosening: The inner tube carries the electrical signal or ground path. Vibration from daily carry or aggressive switching can unscrew it over time. If it loosens too much, the circuit breaks.
Action: Check tightness periodically. It should be snug but not overtightened to the point of stripping threads.
Spring Leaf Fatigue: The spring leaf acts as a tensioner and conductor. Repeated compression during battery changes can flatten the curve, reducing pressure on the battery.
Action: If the light is intermittent, inspect the leaf. Use a non-conductive tool to gently raise the curve, restoring tension. Be careful not to snap the metal.
Thermal Paste and Heat Sinking While not in the original text, this is critical for high-output lights. The LED sits on a copper starboard, which sits on the aluminum head.
The Issue: Over years of heating and cooling, the factory thermal paste can dry out, creating air gaps. Air is a thermal insulator.
The Fix: If your light throttles (dims) faster than it used to, disassemble the head and reapply high-quality thermal grease (e.g., Arctic MX-4). This ensures heat transfers rapidly from the LED to the heatsink, maintaining Turbo runtimes.
Field Application: The Troubleshooting Matrix
When the light fails, diagnose systematically. Do not panic.
Symptom: Light flickers on Turbo.
Diagnosis: High resistance connection or battery sag.
Fix:
Clean all threads and contacts with alcohol.
Swap the battery for a known high-drain cell.
Tighten the head and tail cap.
Symptom: Light turns off after 30 seconds on Turbo.
Diagnosis: Thermal Regulation (normal) OR Low Voltage Protection (LVP).
Fix: If the body is cool but it shuts off, check your battery. It likely hit the LVP threshold (approx 2.8V) because it couldn't sustain the amp draw. Replace with a higher quality IMR cell.
Symptom: Tail switch is unresponsive.
Diagnosis: Mechanical disconnect.
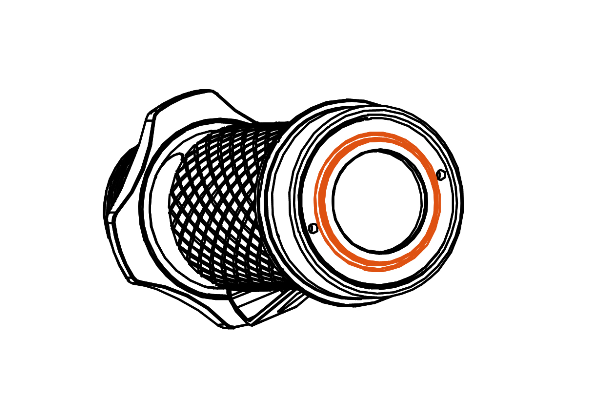
Fix: Unscrew the tail cap. Check the spring leaf tension. Ensure the o-ring is seated correctly and not pinched, preventing the cap from tightening fully against the contact.
Technical FAQs
Q: Can I use a CR123A battery in a light meant for 18650? A: Only if the manual explicitly states it supports it. An 18650 is 3.7V nominal; a CR123A is 3.0V nominal. While they fit physically in some tubes, the voltage difference may cause the driver to malfunction or the light to underperform significantly. Never force a battery size not designed for the host.
Q: How often should I lubricate the threads? A: Every time you clean the contacts or change the o-rings. Use a dedicated thread lubricant (like Fenix TKL or generic synthetic grease). Apply a thin film. Too much lube attracts dust and creates a grinding paste that wears down the aluminum threads.
Q: My spring leaf looks oxidized (dark spots). What do I do? A: Oxidation increases resistance. Polish it gently with a fiberglass pen or very fine sandpaper (2000 grit), then clean with alcohol. If the plating is gone, the brass underneath will corrode quickly. Consider replacing the part if possible.
Q: Why does my light get hot even when not turned on? A: This indicates a "short" or a partial engagement of the switch. Remove the battery immediately. Check the tail cap spring or leaf to ensure it isn't stuck in the depressed position. Store the light with the battery reversed (negative up) if the design permits, to break the circuit during transport.
Long-Term Storage Protocols
If you are storing your light for an expedition or emergency kit:
Remove the Battery: Never store a light with the battery inside. Vibration can cause the tail cap to loosen, engaging the switch and draining the cell, or worse, causing a short circuit.
Loosen the Tail Cap: If you must store it assembled, loosen the tail cap slightly until the light does not turn on. This prevents accidental activation.
Battery Voltage: Store Li-ion batteries at roughly 3.6V - 3.8V (approx. 40-60% charge). Storing them at 100% accelerates chemical aging; storing them at 0% risks dropping below the critical voltage floor, rendering the cell dead.
Your equipment is your lifeline. Treat it with the discipline it requires. Clean contacts, proper batteries, and mechanical vigilance are the hallmarks of a professional.


 English
  中文
中文